
Inside My Fully Soundproofed Drum Studio — From Garage to Recording Space
This studio is the end result of a two-year project where I designed and built a soundproof recording space in my detached garage here in Finland. I can play heavy-handed drums 24/7 without disturbing neighbours, thanks to proper sound isolation and a carefully planned structure and execution. Below is the complete tour video of the final studio space.
🎬 Full Soundproof Studio Tour Video
The video walks through the finished studio: drum area, control desk, acoustic treatment, lighting, and talk a bit how it was to build this.
From This…
This entire studio began as an ordinary half-warm garage — concrete slab, self ventilating exterior walls, and a layout far from ideal for sound isolation. Over months of planning, professional reviews, and careful construction, it was transformed into a structure capable of containing real drum kit volume.
Before: Garage interior before studio build
…To This.
The final space is a sound isolated drum recording studio with controlled acoustics, proper ventilation, heating/cooling (mini split, and pre-existing floor heating), a bathroom, and a comfortable lounge/mixing area — all sitting inside a suburban detached-house neighbourhood.
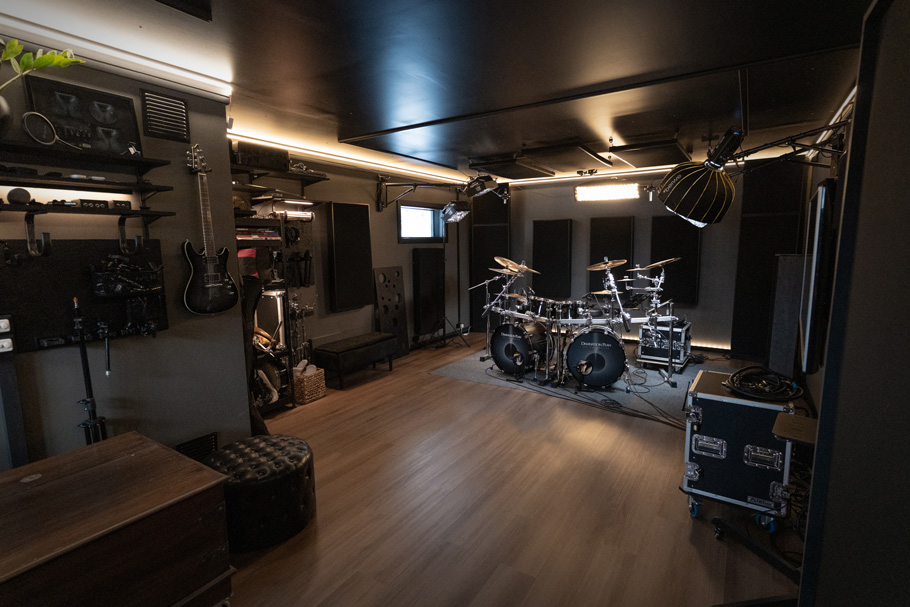
Drum Recording Area
This is the heart of the studio — designed for both recording and filming drum performances. The acoustic treatment surrounding the kit includes bass traps, wall panels, ceiling clouds, and gobos, all custom-built to fit the decoupled interior frame and the exact size of my particular room.
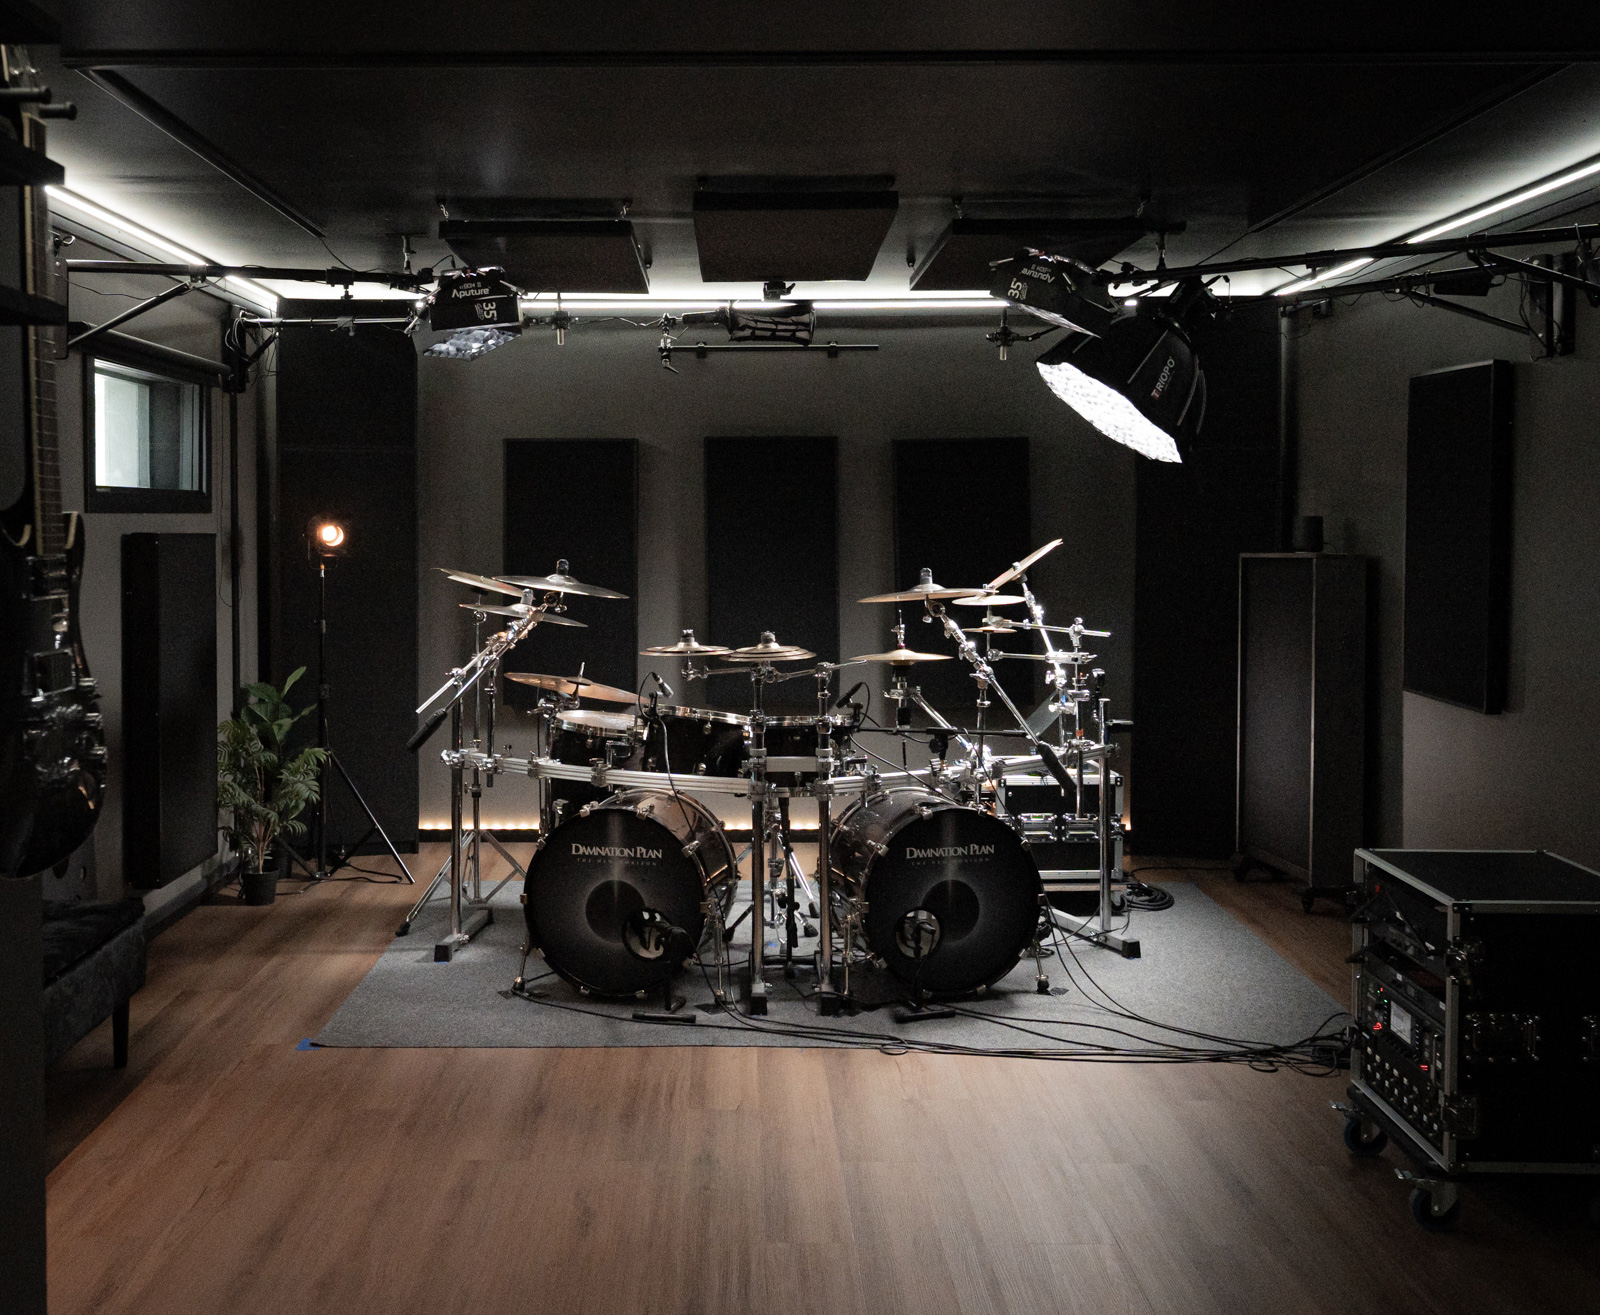
Every piece of treatment was designed to complement the room’s sound while staying visually clean and viby. The drums are at a premiere position (for once!) and not stuffed in the corner, which tends to be the way in home studios (this is wrong ;)).
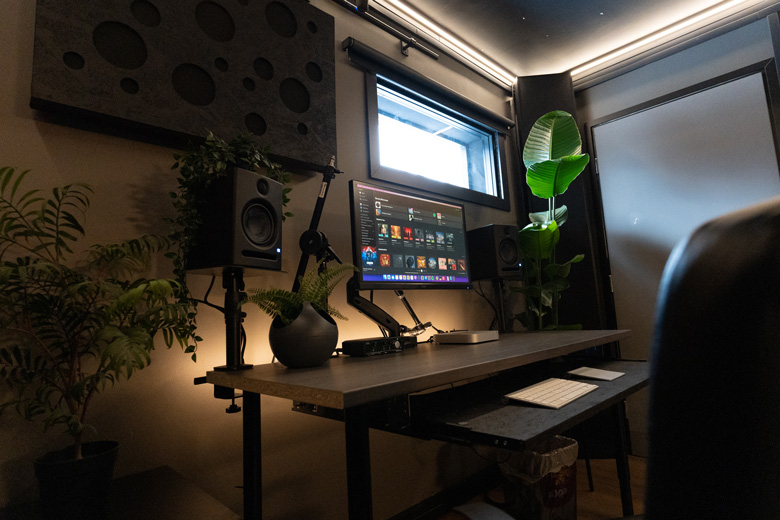
Mixing / Lounge Area
This space doubles as a small control area for recording and a lounge for breaks. The design keeps reflections controlled while maintaining a comfortable, inspiring atmosphere. This is a starting point treatment and layout wise. The treatment can be added as the studio is being used and time gets freed to possibly test and figure out extra improvements.
All wiring and routing (audio, electrical, lighting) were planned during the soundproofing phase to maintain airtightness and prevent sound leaks — something you might only discover too late if you don't know all things to take into consideration.
Air Ventilation & HVAC
Air ventilation should not be overlooked if you are going to spend hours with multiple people in the room. Here in the Nordics the weather can change from +33 celcius to -30 celcius during the year - so also heating/cooling is essential to get installed. Both of these aspects were integrated in a way that keeps the room isolated, and comfortable while meeting code requirements.
Want to Learn How This Build Was Done Step by Step?
This studio is the result of hundreds of decisions — materials, product choices, sequences, structural solutions, cost-saving opportunities, and soundproofing methods that had to work together as one system.
All solutions were reviewed by structural and HVAC professionals involved in the build.
If you're planning a build of your own, you can see every step, detail, challenge, and solution how this whole studio was built, the code eliginle solutions shown, before you start your own build (use it as a direct baseline, or adapt parts from it) - the whole build is covered in the Garage To Soundproof Studio Blueprint course:
- featuring 7 hours of real on-site footage (no fluff), and insights
- Every major step and solution of the construction documented and shown
- Product lists of 200+ products and materials
- HVAC, heating/cooling, bathroom integration, and electrical routing
- Acoustic treatment design and installation
- Insights that helped me save thousands during the project
👉 See the full course details here
Want to Build the Same Acoustic Treatment?
If you're specifically interested in the acoustic panels, bass traps, gobos, or ceiling clouds featured in the tour, the Acoustics Build Mini Course walks through all of them in detail — including structure, materials, mounting, and layout logic.
👉 Watch the first episode free (scroll to the mini course)
Final Thoughts
This studio represents what’s possible when proper planning, code-compliant construction, and soundproofing principles come together — even starting from a basic residential garage. If you’re considering your own build, I hope this tour inspires you and gives you a clear reference of what a successful soundproof studio project can look like.
If you want the full blueprint I didn’t have when I started, the course shares everything I learned along the way — so you can build smarter, avoid costly mistakes, save a lot of time (and now unnecessary f*cking around), and get it right the first time.